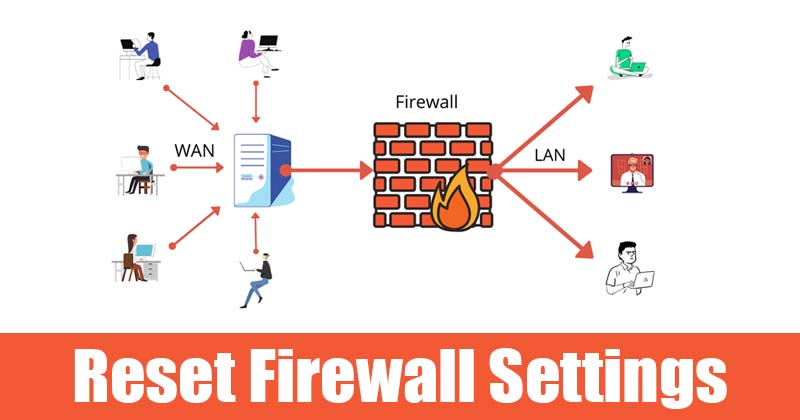
In most cases, you don’t need to manipulate any settings to the Firewall application, but there are times when we want to disable the security feature. Windows Firewall might also conflict with other apps during the installation like Antivirus apps, remote access tools, etc. Although you can modify Firewall rules to resolve the conflict, sometimes we make changes to Firewall out of no knowledge and invite more troubles. If you have messed up your Firewall settings on Windows 10, you might need to reset every firewall Settings. Also Read: How to Rollback Windows 10 Updates (Including Insider Builds)
List of 4 Best Methods to Reset Firewall Settings in Windows 10
So, in this article, we will share a step-by-step guide on how to reset Firewall settings on Windows 10 computer. We have listed different ways to reset all firewall settings. Let’s check out.
1. Reset Firewall From the Control Panel
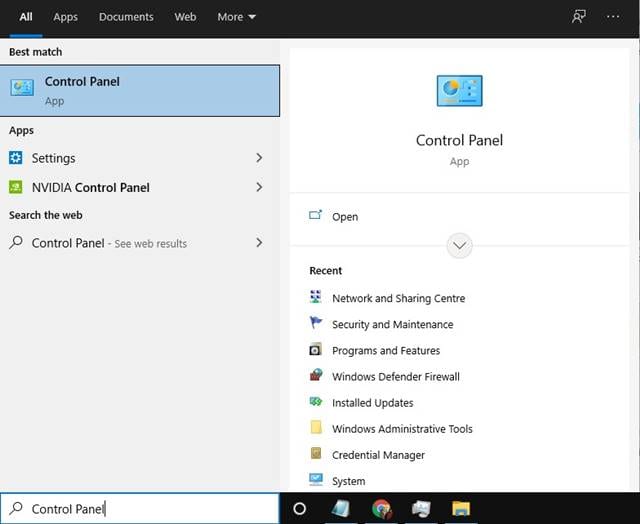
Resetting the Firewall isn’t a complicated thing. Anyone can do it via the Control Panel. You need to follow the simple steps listed below to reset Firewall settings on Windows 10. Step 1. First of all, open Windows Search and type in ‘Control Panel.’ Open Control Panel from the list.
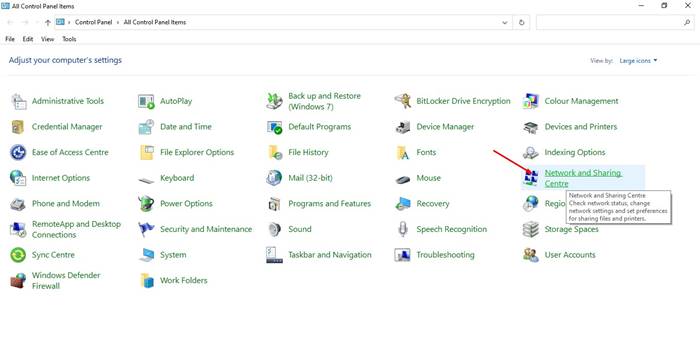
Step 2. On the Control Panel, click on ‘Network and Sharing Centre.’
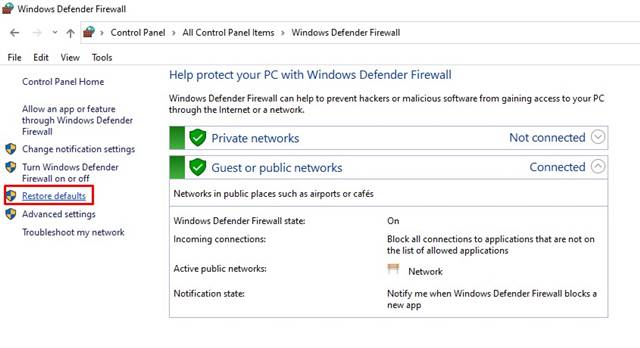
Step 3. Now click on the ‘Windows Defender Firewall’ option located at the bottom of the screen.
Step 4. On the left pane, click on the Restore Defaults option.
Step 5. On the next Window, click on the ‘Restore defaults’ option.
That’s it! You are done. This is how you can reset Windows 10 Firewall settings via the Control Panel.
2. Reset Firewall Through Settings App
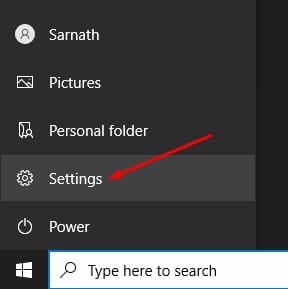
Like Control Panel, the Settings app for Windows 10 also lets you reset the Windows Firewall. Follow some of the simple steps below to reset the Windows Firewall via the Settings app. Step 1. First of all, click on the Start button and select ‘Settings.’
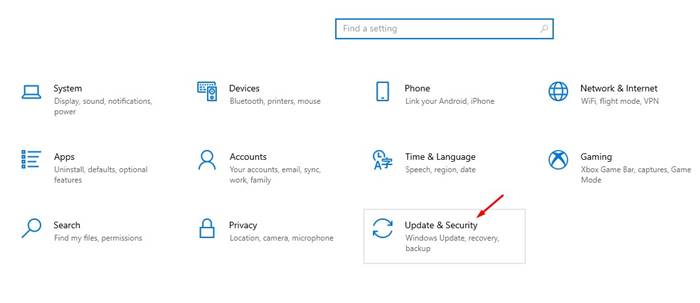
Step 2. On the Settings page, click on the ‘Update & Security’ option.
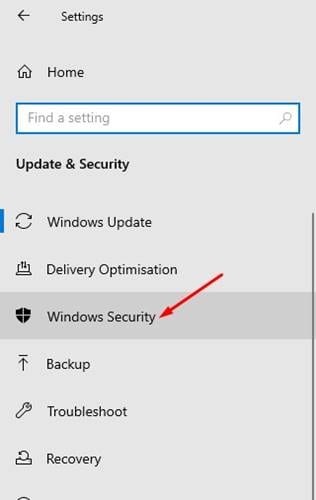
Step 3. On the left pane, click on ‘Windows Security’.
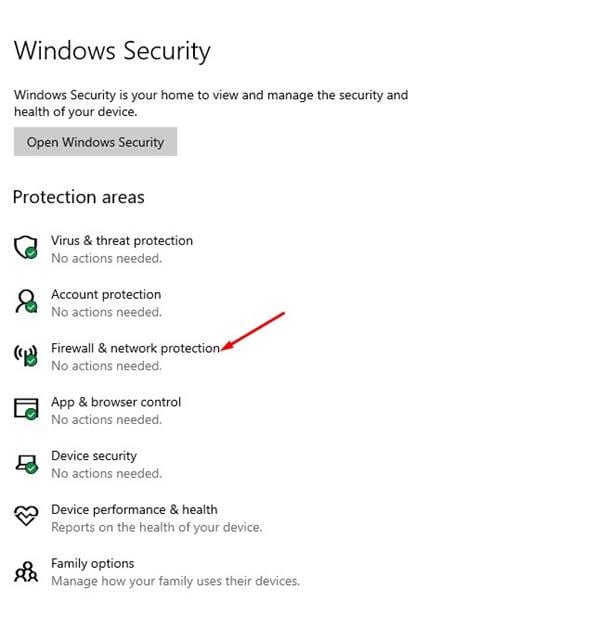
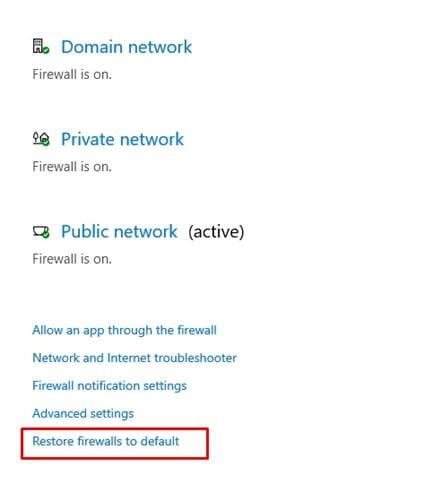
Step 4. On the right pane, click on the ‘Firewall & Network protection’ option.
Step 5. On the next page, click on the ‘Restore firewalls to default’ option.
Step 6. Next, click on the ‘Restore defaults’ and then click on ‘Yes’ to confirm the action. That’s it! You are done. This is how you can reset the Windows firewall via the Settings app.
3. Reset Firewall using PowerShell
If you cannot access the control panel or Settings app due to any reason, you can utilize this method to reset the Windows firewall. In this method, we will use Windows PowerShell to reset the Firewall options. Follow the steps given below to reset firewall settings via Powershell.
Open Windows Search and type in ‘PowerShell’ Right-click on Powershell and select ‘Run as administrator’ On the PowerShell Window, enter the command –
(New-Object -ComObject HNetCfg.FwPolicy2).RestoreLocalFirewallDefaults() That’s it! You are done. Now restart your computer to apply the default Firewall rules.
4. Reset Windows Firewall using Command Prompt
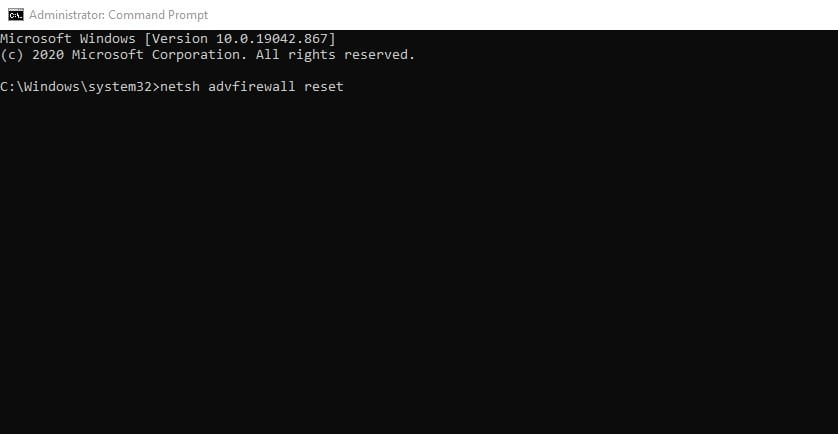
Like PowerShell, you can also utilize the Command Prompt to reset the firewall settings. Follow some of the simple steps below to reset the firewall via CMD on Windows 10.
Open Windows search and type in CMD. Right-click on the CMD and select ‘Run as Administrator’ On the Command Prompt Window, enter the command –
netsh advfirewall reset That’s it! The above command will reset all your firewall settings. Just restart your computer to apply the default settings of the Firewall. So, this article is all about how to reset Firewall Settings in Windows 10 computers. I hope this article helped you! Please share it with your friends also. If you have any doubts related to this, let us know in the comment box below.
Δ
