If you have been using Windows operating system for a while, then you might be well aware of the taskbar. It’s one of the most ingenious features of the operating system. The taskbar is located at the bottom of the computer screen that lets you quickly access frequently used applications. It’s a pretty useful tool, but it’s also one you might not want to see on your screen all the time. Few users prefer to auto-hide the Windows 10 taskbar to save screen space. So, if you are amongst those who feel that the taskbar takes too much valuable screen, then hiding the taskbar might be the best option.
How To Automatically Hide the Taskbar in Windows 10 PC
The latest version of Microsoft Windows lets you auto-hide the taskbar. Hiding the taskbar is a quick and easy process that takes just a few seconds. So, in this article, we have decided to share the two best methods to auto-hide the taskbar.
1. Hide Taskbar from the Taskbar Settings
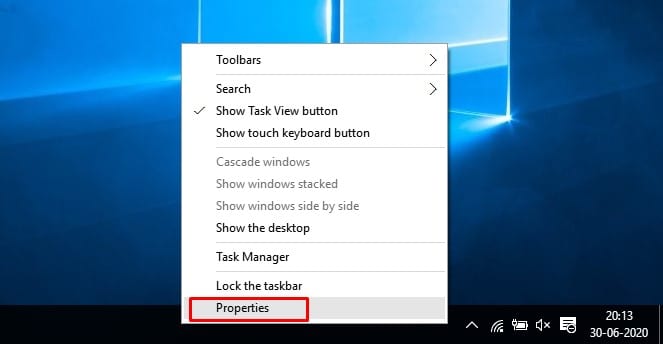
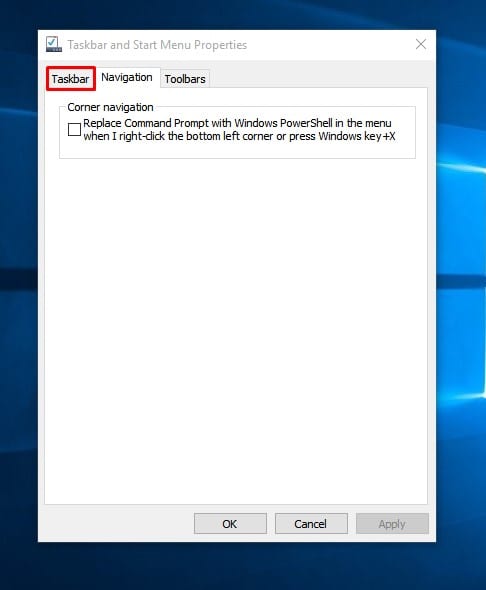
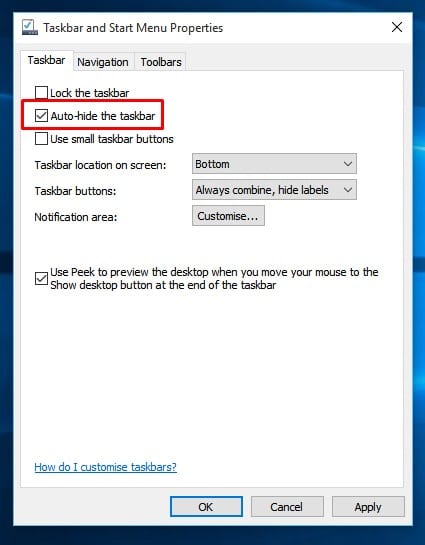
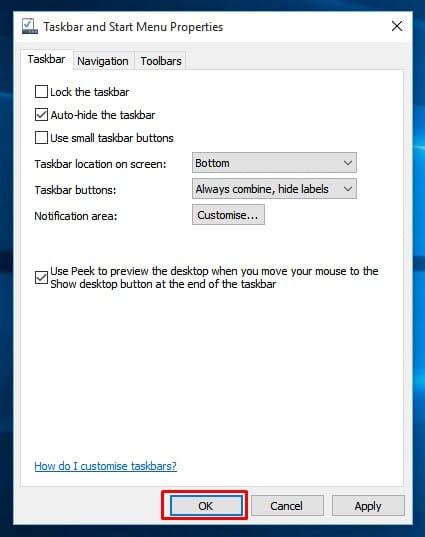
You can hide the Windows 10 taskbar without installing any customization tools. Follow some of the simple steps given below to hide the taskbar in settings automatically. Step 1. First of all, right-click anywhere you the taskbar and select ‘Properties’ Step 2. On the Task Bar and Start Menu Properties, select the ‘Taskbar’ tab. Step 3. On the Taskbar settings, you need to enable the ‘Auto-hide the taskbar’ option. Step 4. Once done, click on the ‘Ok’ button. Step 5. Now the taskbar will automatically hide. To show the taskbar, just hover your mouse over the taskbar. That’s it! You are done. This is how you can hide the taskbar on Windows 10 using the taskbar settings.
2. Using Command Prompt
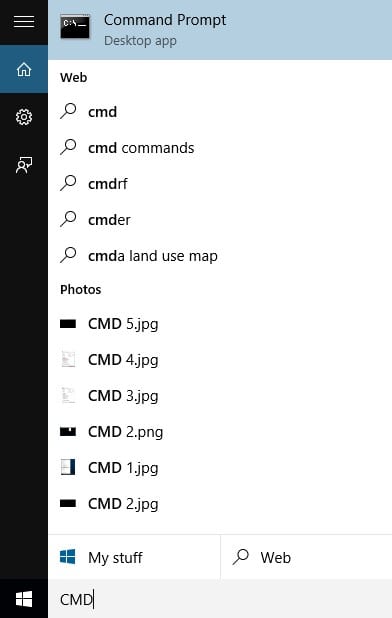
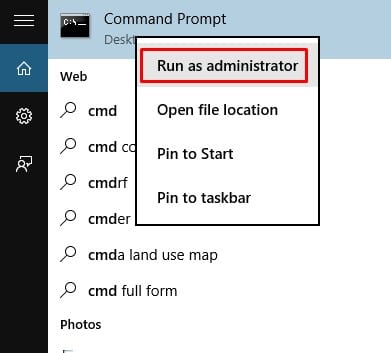
If you are unable to access the ‘Auto-hide taskbar’ option on the Taskbar settings, then you need to follow this method. In this method, we will be using Command Prompt to auto-hide the Windows 10 taskbar. Step 1. First of all, open Start menu and search for ‘CMD’ Step 2. Right-click on the CMD and select ‘Run as administrator’ Step 3. On the Command Prompt Window, enter the given command – powershell -command “&{$p=‘HKCU:SOFTWARE\Microsoft\Windows\CurrentVersion\Explorer\StuckRects3’;$v=(Get-ItemProperty -Path $p).Settings;$v[8]=3;&Set-ItemProperty -Path $p -Name Settings -Value $v;&Stop-Process -f -ProcessName explorer}” Step 4. The above command will auto-hide the taskbar. Step 5. To turn off the auto-hide taskbar option, enter this command – powershell -command “&{$p=‘HKCU:SOFTWARE\Microsoft\Windows\CurrentVersion\Explorer\StuckRects3’;$v=(Get-ItemProperty -Path $p).Settings;$v[8]=2;&Set-ItemProperty -Path $p -Name Settings -Value $v;&Stop-Process -f -ProcessName explorer}” That’s it! You are done. This is how you can auto-hide the taskbar. So, this article is all about how to hide the taskbar on Windows 10. I hope this article helped you! Share it with your friends also.
Δ
